Know How to Setup your Amazon Echo Dot to Solve WiFi Related Issues
If you have recently purchased or gifted Amazon Echo dot and do not know what to do next to use the different features of your Echo device then don’t worry! You have reached the right place. The most important step that you need to perform to make your Echo dot workable is to carry out the steps for the echo dot setup. Also, before asking your Amazon Echo speakers to play your favorite Spotify playlist, turn on room lights then you will need to make a few settings of your Amazon Echo dot such as WiFi-related settings. In these settings, Alexa has also trained to recognize your voice and many more. In this blog, you will get to know the steps for set up your Amazon echo dot by connecting it to the WiFi connection.
Quick Steps for Amazon Echo Dot WiFi Setup
Most of the connection-related issues start in the Amazon Echo dot setup process. An Echo dot device that was not set up properly or unable to connect with a WiFi connection can create problems in using different features of Echo dot. Look at the below steps for Amazon Echo dot WiFi setup:
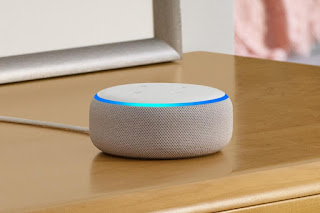
- Firstly, plug in Echo dot by using the power cable. After that, the right light on the Echo dot will turn blue and it starts spinning which means that the device is turned on.
- The speaker goes to the setup mode and the blue light will turn to orange. Alexa will welcome you to the Echo dot device. If the orange light is not appearing on the Echo dot, then press and hold the action button on your device for five seconds.
- Thereafter, download the Alexa app from your Android or iOS device. You can also access the Alexa app from your web browser.
- The Echo dot setup starts automatically and you are navigated to the sign-in webpage with your Amazon email account and password.
- If the Echo setup does not start automatically and the orange light does not appear on the device then you need to switch on the Echo head from the Alexa app. Click on the “Devices” given at the bottom and then “+” appears at the upper right corner.
- Select date, time, and language. Also, choose the device from the list that you are trying to set up.
- In the next step, connect your Alexa app to the Echo dot. Also, connect your Echo to the WiFi network.
- On the beginning screen of the Echo setup, tap on “Connect to WiFi”. If the orange ring appears on your Echo device, then it means it is connected to the WiFi network successfully.
- Close the Alexa app. Go to the settings and then the WiFi option. If your smartphone recognizes the Echo dot then you see the wireless network with a name. It can take some time to appear in the list of networks.
- Once you choose the wireless network, you need to enter the password if required. After that, you are successfully connected to the Amazon Echo dot.
- Thereafter, you will be prompted to connect with the main WiFi network by entering your WiFi password when asked by the system and the Echo will join the network.
- At this point, your Echo dot device is on the same network and can communicate with each other.


Comments
Post a Comment